Introduction to Homemade Bread
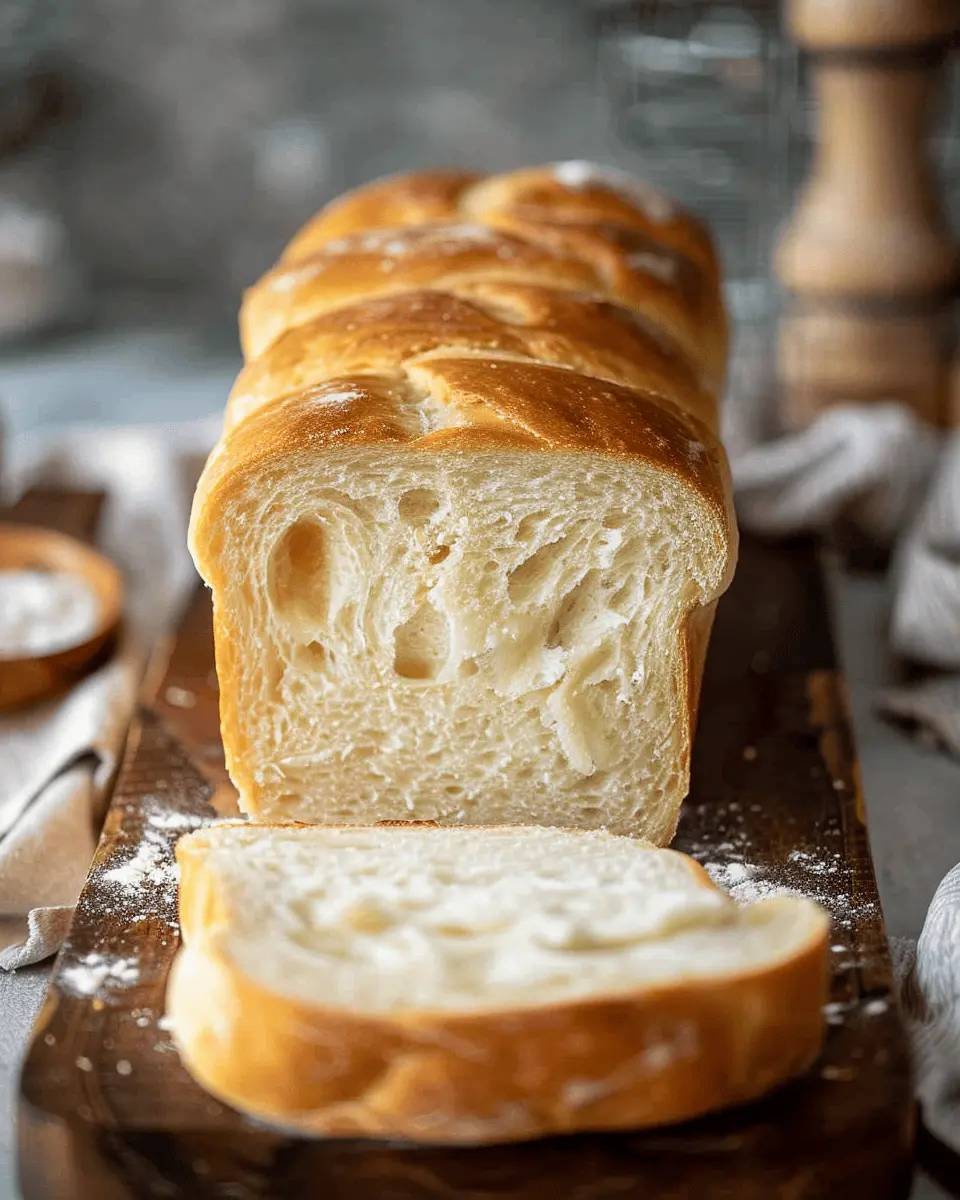
Making homemade bread is a delightful experience that can transform your kitchen into a haven of warmth and comfort. The aroma of freshly baked bread wafting through the house is a feeling like no other, and the rich flavor of bread you’ve crafted yourself brings a sense of accomplishment to each meal. Have you ever thought about how different your sandwiches could be with fresh homemade bread versus the packaged stuff? That’s just a start!
Why making homemade bread is a game-changer?
There are several reasons why diving into the world of homemade bread is a game-changer for both your palate and your lifestyle:
-
Healthier Ingredients: When you make your own bread, you control what goes into it. No preservatives, no hidden additives—just pure, wholesome ingredients. You might even find yourself experimenting with whole grains and seeds, which can boost your health and nutrition.
-
Cost-Effective: Store-bought artisan bread can be pricey. Embracing the craft of homemade bread not only saves money but also provides a more fulfilling culinary adventure. According to the USDA, the cost of wheat has fluctuated, making homemade options even more attractive for budgeting young professionals.
-
Simple Satisfaction: There’s nothing quite like kneading dough and watching it rise. It’s a therapeutic process that can serve as a fantastic stress reliever after a long workday. The tactile nature of bread-making can also be a creative outlet, allowing you to personalize each loaf with your favorite herbs and spices.
-
Social Opportunities: Freshly baked bread is a wonderful way to bring people together. Whether you’re hosting a get-together or simply dropping off a loaf for a friend, homemade bread is always appreciated and admired. Plus, nothing beats the shared joy of breaking bread with others.
As you embark on this delicious journey into homemade bread, keep it fun and try different recipes. From classic white bread to whole grain variants, the options are endless! Ready to get started? Check out The Bread Lab for tips and techniques to enhance your baking skills. Happy baking!

Ingredients for Homemade Bread
Baking your own homemade bread can be a rewarding experience, and it starts with a few essential ingredients. If you’re new to bread-making, here’s what you need:
Essential ingredients you need
- Flour: All-purpose flour works well, but bread flour provides that chewy texture we love. You can experiment with whole wheat or a mix for added nutrition.
- Water: Use warm water (around 110°F) to activate the yeast effectively.
- Yeast: Instant yeast is super convenient, but you can also use active dry yeast—just let it proof in water first.
- Salt: This is crucial for flavor, and it regulates yeast activity, ensuring your bread rises perfectly.
- Sugar: A touch of sugar helps feed the yeast and adds a hint of sweetness.
For more tips on choosing the right flour, check out King Arthur Baking.
Optional add-ins for extra flavor
Once you’ve mastered the basics of your homemade bread, consider these delicious add-ins:
- Seeds: Think sunflower, sesame, or flax for a delightful crunch and visual appeal.
- Herbs: Fresh or dried herbs like rosemary or thyme can elevate your bread’s flavor.
- Cheese: Adding shredded cheese can create a savory loaf that’s perfect for sandwiches.
By selecting both essential and optional ingredients intentionally, you’ll create a bread that not only nourishes but also brings comfort. What are your favorite add-ins for homemade bread?
Preparing Homemade Bread
Making homemade bread might seem like a daunting endeavor, but with a little patience and the right guidance, it can be one of the most rewarding culinary experiences! Here’s a step-by-step guide to take you from your kitchen to the aroma of freshly baked bread wafting through your home.
Gather your ingredients
Start with some basic ingredients that you likely have in your pantry. For a simple homemade bread recipe, you’ll need:
- 4 cups all-purpose flour
- 2 teaspoons salt
- 2 tablespoons sugar
- 2 1/4 teaspoons (1 packet) active dry yeast
- 1 1/2 cups warm water (around 110°F or 43°C)
- 2 tablespoons olive oil (optional for added flavor)
Make sure your ingredients are fresh! Yeast, in particular, is crucial for that perfect rise, and stale ingredients might lead to disappointing results. Need some top-notch flour? Check out brands like King Arthur or Bob’s Red Mill.
Mix the dry ingredients
In a large mixing bowl, combine the dry ingredients: flour, salt, sugar, and yeast. It’s a good habit to mix them well with a fork or whisk; this ensures even distribution of the yeast and salt, preventing any yeast from being inhibited. This is crucial for the homemade bread to rise beautifully.
Activate the yeast
In a separate bowl, add warm water and stir in the sugar. Sprinkle the yeast on top and allow it to sit for about 5-10 minutes. You’re looking for it to become foamy and bubbly—a sign that the yeast is alive and ready to work its magic.
Combine the wet and dry ingredients
Once your yeast is activated, create a well in the center of your dry ingredients and pour in the yeast mixture along with the olive oil. Stir with a wooden spoon until the dough comes together. It might look a bit shaggy at this point; that’s perfectly okay!
Knead the dough
Flour your work surface lightly and turn the dough out onto it. Kneading is a crucial step—this is where the magic happens! Fold, push, and stretch the dough for about 8-10 minutes until it becomes smooth and elastic. You might want to channel a little aggression into this part; it’s therapeutic!
Let it rise
Place the kneaded dough into a greased bowl and cover it with a clean kitchen towel or plastic wrap. Let it rise in a warm place until it doubles in size (about 1-2 hours). A warm oven or a sunny kitchen corner could serve as a perfect spot.
Shape the dough
Once your dough has risen beautifully, take it out and gently punch it down to release any trapped air. Shape it into your desired form—whether a loaf or rolls. This is also where you can get creative! If you’re feeling adventurous, consider adding herbs, cheese, or even sun-dried tomatoes for a flavor twist.
Second rise
Once shaped, place your dough on a baking sheet lined with parchment paper or in a greased loaf pan. Cover it and let it rise for a second time, about 30-60 minutes. This step helps to develop a lighter, airier texture.
Bake your homemade bread
Preheat your oven to 375°F (190°C). Once your dough has completed its second rise, it’s time to bake! Depending on the shape you chose, baking could take anywhere from 25-35 minutes. You’ll know it’s ready when it’s golden brown and sounds hollow when tapped on the bottom.
For an extra crusty top, consider using a steam method by placing a pan of hot water in the oven during the first few minutes of baking.
There you have it! You’re now on your way to baking delicious homemade bread. Not only will it fill your home with irresistible smells, but it’s also a great way to impress friends or simply enjoy fresh bread at any meal. Happy baking!
Variations on Homemade Bread
Baking your own bread opens a world of possibilities! Once you have the basic homemade bread recipe down, you can easily explore delightful variations to suit your taste buds. Here are a few ideas to get you started on your baking adventure.
Whole Wheat Homemade Bread
If you’re looking for a healthier option, whole wheat homemade bread is a fantastic choice. Whole wheat flour is packed with nutrients and fiber, making your loaf not only hearty but also nourishing. To make this variation:
- Substitute half or all of the white flour with whole wheat flour.
- Consider adding a touch of honey or molasses for sweetness, which balances the nuttiness of the whole wheat.
By doing this, you’ll have a loaf that’s not only wholesome but also delicious!
Herb-Infused Homemade Bread
Fancy up your baking by infusing your homemade bread with fresh or dried herbs! Imagine biting into warm bread layered with flavors like rosemary, thyme, or basil. Here’s how:
- Add around 1-2 tablespoons of chopped fresh herbs (or 1 teaspoon of dried herbs) into your dough.
- For a delightful twist, mix up a garlic herb butter to slather on top once it’s baked.
This herb-infused loaf works beautifully with soups or salads, making any meal feel gourmet.
Sweet Homemade Bread with Cinnamon
For those who love sweeter flavors, a cinnamon-sugar homemade bread will satisfy your cravings. It’s perfect for breakfast or an afternoon treat.
To whip up this delightful dish:
- Add 1 tablespoon of cinnamon to your dough and sprinkle in some sugar.
- Create a cinnamon swirl by mixing brown sugar with cinnamon, then folding it into the dough before baking.
It’s an absolute crowd-pleaser and the aroma filling your kitchen is worth every minute of waiting!
These variations not only enhance the flavor but also allow you to explore your creativity in baking. Don’t forget to check out resources like the King Arthur Baking Company for tips and techniques to hone your skills!
Baking notes for Homemade Bread
Baking homemade bread can transform your kitchen into a cozy haven, but it helps to know a few tips and tricks to ensure your loaves turn out perfectly every time.
Choosing the Right Flour
Not all flours are created equal! For the best results, opt for all-purpose or bread flour, which has higher protein content. This promotes better gluten formation, giving your homemade bread that fluffy texture we all crave.
Let It Rise
Patience is essential. Allow your dough to rise until it doubles in size—this can take anywhere from 1 to 2 hours. If you’re in a hurry, consider creating a warm environment by placing it in an oven (turned off) or near a warm stovetop.
Monitor Your Oven Temperature
Always preheat your oven. Baking is as much science as it is art! Using an oven thermometer ensures you hit the right temperature, which can make a significant difference in your loaf.
Experiment with Add-ins
Feel free to personalize your homemade bread! Adding nuts, seeds, or dried fruits can elevate your recipe. For health-conscious choices, consider whole-wheat flour or incorporating ingredients like oats for added texture.
By keeping these baking notes in mind, you’ll not only improve your homemade bread experience but also gain confidence in your skills. Happy baking! For more tips, check out resources from the Bread Baking Guide.
Serving Suggestions for Homemade Bread
Best Pairings for Sandwich-Making
When it comes to homemade bread, the possibilities are endless for crafting delicious sandwiches. Start with a hearty loaf—think rustic sourdough or whole wheat for a nutty flavor. Here are some satisfying combinations you might enjoy:
- Turkey Bacon Club: Layer turkey bacon, fresh lettuce, and ripe tomatoes for a classic twist.
- Avocado and Chicken Ham: Mash ripe avocados onto your bread, then pile on slices of chicken ham and a sprinkle of sea salt.
- Veggie Delight: Stack roasted vegetables like zucchini and bell peppers with hummus on your bread for a refreshing, light meal.
Creative Uses for Leftover Homemade Bread
Don’t let that delightful homemade bread go to waste! Here are some creative ideas to repurpose any leftover slices:
- Bread Crumbs: Blitz them in a food processor and use them to coat chicken or top casseroles.
- French Toast: Transform stale bread into an indulgent breakfast by soaking slices in a mixture of eggs, milk, cinnamon, and a splash of vanilla.
- Croutons: Dice leftover pieces, toss with olive oil and seasonings, and bake until golden for a crunchy salad topper.
Embrace the versatility of your homemade bread and let your culinary creativity shine! Looking for more ideas? Check Serious Eats for fantastic sandwich inspirations.
Tips for Making Perfect Homemade Bread
How to Avoid Common Mistakes
Crafting homemade bread can be incredibly rewarding, but it’s easy to stumble into a few pitfalls. One common mistake is not measuring ingredients correctly. Flour can be notoriously inconsistent; consider weighing it for more precise results. Also, pay close attention to your dough’s hydration; too much or too little water can affect the texture. If the dough feels too sticky, don’t hesitate to add a sprinkle more flour while kneading.
Don’t rush the fermentation process; giving your dough ample time to rise will yield a better crumb and flavor. For perfect bread, patience is key!
Recommendations for Tools and Equipment
Having the right tools can elevate your bread-making game. Here are some essentials to consider:
- Digital Scale: For accurate measurements.
- Mixing Bowls: A set of different sizes for various tasks.
- Dough Scraper: Perfect for handling sticky dough.
- Proofing Basket: To create that lovely shape.
- Baking Stone or Steel: A great investment for achieving a crispy crust.
If you’re looking to dive deeper into bread-making techniques, resources like King Arthur Baking can provide valuable insights. Embracing the right tools can turn baking into a seamless and pleasurable experience. So, gather your ingredients, and let’s make some unforgettable homemade bread together!
Time Breakdown for Homemade Bread
When you’re embarking on the journey of making homemade bread, understanding the time it takes can make the experience even more enjoyable. Here’s a quick breakdown to guide you through the process:
Preparation Time
Think of this as your chance to get creative! Preparing the ingredients usually takes about 15-20 minutes. Measure out your flour, yeast, and any extras you love, like herbs or spices.
Rising Time
This is where the magic happens! The dough needs around 1 to 2 hours to rise. This gives you the perfect window to relax or maybe catch up on a favorite show while the yeast does its job.
Baking Time
Once risen, pop that beautifully fragrant dough in the oven for about 30-35 minutes. The aroma that fills your kitchen will be worth the wait!
Total Time
All things considered, you’re looking at roughly 2 to 3 hours from start to finish. But don’t worry—most of that time is hands-off! Just imagine the satisfaction of slicing into your fresh homemade bread.
If you’re curious about the science behind bread-making, consider checking out King Arthur Baking’s resources for expert tips and tricks.
Nutritional facts for Homemade Bread
Calories per slice
When you whip up a loaf of homemade bread, you might be wondering about its calorie content. On average, one slice of this delightful bread contains around 70-80 calories. However, these numbers can vary based on the ingredients you choose. Using whole wheat flour can increase the calories slightly but also boosts fiber content, making it a satisfying choice.
Macronutrient breakdown
The macronutrient profile of homemade bread typically looks like this:
- Carbohydrates: Approximately 12-15g per slice, providing energy for your day-to-day activities.
- Protein: You’ll find about 2-3g, which is essential for muscle repair and growth.
- Fat: This usually falls around 1g or less, especially if you opt for minimal added fats.
If you’re looking to enhance the nutrition of your loaf, consider adding seeds or nuts for an extra health boost! For more detailed nutritional insights, you can check out resources like the USDA FoodData Central.
Staying mindful of what goes into your homemade bread doesn’t just make it tastier; it also allows you to enjoy a healthier loaf, perfect for sandwiches or toast.
FAQs about Homemade Bread
How can I make homemade bread without a stand mixer?
Making homemade bread without a stand mixer is entirely possible and often quite enjoyable. The key is to engage with your dough! You can mix and knead by hand using simple tools like a mixing bowl and a spatula or your hands. Here is a quick process:
- Mix: Combine your dry ingredients in one bowl and wet ingredients in another, then gradually incorporate the wet into the dry.
- Knead: Lightly flour a clean surface, turn your dough out, and knead it for about 10 minutes. It should become smooth and elastic. Remember, the best ingredient you can add is patience!
Don’t worry; the effort is worth it. According to experts, many prefer this hands-on approach as it helps develop a connection with the baking process.
What do I do if my dough doesn’t rise?
Dough not rising can feel disheartening, but don’t throw it out just yet! Here are some troubleshooting tips:
- Check your yeast: Ensure it’s active by proofing it in warm water with a bit of sugar before using it. If it’s frothy after 5-10 minutes, it’s good to go!
- Warm environment: Dough likes warmth. Find a cozy spot (like in an oven with just the light on) to help it rise.
- Time: Sometimes dough just needs more time. Be patient and give it an extra hour or so.
These little checks can save your loaf!
Can I freeze homemade bread?
Absolutely! Freezing is a fantastic way to preserve the goodness of your homemade bread for later. Here’s how to do it right:
- Cool completely: Allow your bread to cool before freezing to maintain texture.
- Wrap securely: Use plastic wrap, then place it in a resealable freezer bag. This extra layer helps prevent freezer burn.
- Thawing: When you’re ready to eat it, simply leave it at room temperature or toast slices straight from the freezer—a real treat!
For more tips on freezing bread, check out King Arthur Baking. Enjoy baking!
Conclusion on Homemade Bread
The Satisfaction of Homemade Bread
There’s nothing quite like the feeling of pulling a fresh loaf of homemade bread from the oven. The aroma fills your kitchen and soon your entire home, creating a welcoming environment that’s hard to replicate with store-bought products. The texture and flavor of freshly baked bread are unmatched, and what’s more, making it yourself allows for creativity—experiment with herbs, spices, or even a hint of sweetness in your dough.
Have you ever noticed how satisfying it is to knead the dough, feeling the transformation beneath your hands? And when you slice into that warm loaf, spreading a bit of wholesome butter, you’re not just enjoying bread; you’re savoring the rewards of your effort. For inspiration on artisan techniques, check out resources from King Arthur Baking or The Bread Lab for more insights. Embrace the journey of baking because, at the end of the day, homemade bread is not just food; it’s a heartfelt experience.
PrintHomemade Bread: The Easy Way to Elevate Your Meals Today
Learn how to make delicious homemade bread that will elevate your meals effortlessly.
- Prep Time: 20 minutes
- Cook Time: 30 minutes
- Total Time: 1 hour 50 minutes
- Yield: 1 loaf 1x
- Category: Bread
- Method: Baking
- Cuisine: Homemade
- Diet: Vegetarian
Ingredients
- 4 cups all-purpose flour
- 2 teaspoons salt
- 1 tablespoon sugar
- 2¼ teaspoons active dry yeast
- 1¾ cups warm water
Instructions
- In a large bowl, combine flour, salt, sugar, and yeast.
- Add warm water and mix until a dough forms.
- Knead the dough for 10 minutes until smooth.
- Let the dough rise in a warm place for 1 hour.
- Preheat the oven to 375°F (190°C).
- Shape the dough into a loaf and place it in a greased pan.
- Bake for 30 minutes or until golden brown.
Notes
- For added flavor, consider incorporating herbs or spices.
- To check if the bread is done, tap the bottom; it should sound hollow.
Nutrition
- Serving Size: 1 slice
- Calories: 120
- Sugar: 1g
- Sodium: 300mg
- Fat: 1g
- Saturated Fat: 0g
- Unsaturated Fat: 0g
- Trans Fat: 0g
- Carbohydrates: 25g
- Fiber: 1g
- Protein: 4g
- Cholesterol: 0mg
Keywords: Homemade Bread