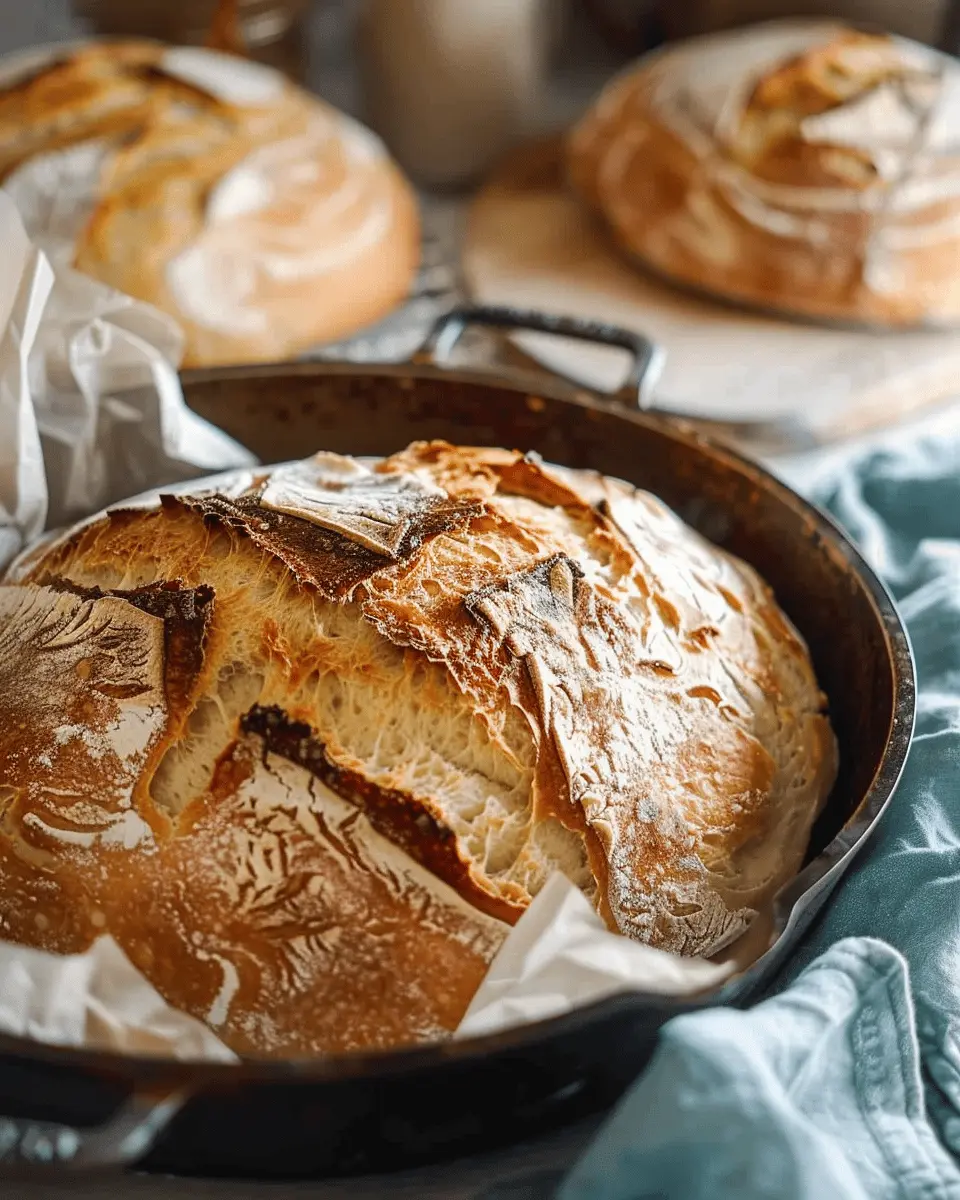
Introduction to Artisan Bread
Why Artisan Bread?
When you think of artisan bread, what comes to mind? Perhaps you envision a crisp, golden crust, a warm, fluffy interior, and that incredible aroma filling your kitchen. Artisan bread is more than just a food item; it’s a representation of craftsmanship and tradition. Unlike mass-produced bread, which often contains preservatives and artificial flavors, artisan bread is made using high-quality ingredients and time-honored techniques. It’s a wholesome choice that reflects a commitment to quality and taste.
According to experts from the Bread Bakers Guild of America, artisan bread has gained popularity because it connects people to their food, promoting mindful eating and a greater appreciation for culinary arts. Imagine sharing a fresh loaf with friends or family—there’s something magical about breaking bread together that transcends generations.
The Joy of Baking at Home
Baking artisan bread at home can seem daunting, but let me put your mind at ease. With the right ingredients, a bit of patience, and a little practice, you’ll find that the process can be as enjoyable as the final product. As someone who began baking during the pandemic, I can attest to the therapeutic nature of kneading dough and watching it rise. The art of baking fosters a sense of accomplishment that few other activities can provide.
Consider these benefits of home baking:
-
Creativity: Experiment with different flours, add-ins like herbs or seeds, and shapes. Your kitchen can easily become your canvas.
-
Healthier Choices: Control the ingredients and avoid preservatives that are often found in store-bought bread.
-
Cost-Effective: Making your own bread can save money compared to high-quality store-bought alternatives.
So why wait? If the thought of kneading dough has you a bit intimidated, I encourage you to take the plunge. For an excellent starter recipe, head over to this Beginner’s Bread Guide to help you get going.
Baking artisan bread isn’t just about food; it’s about creating an experience. So roll up your sleeves, and let’s get started on this delightful culinary adventure!
Ingredients for Artisan Bread
Essential ingredients for perfect artisan bread
Creating artisan bread at home may seem intimidating, but with the right ingredients, you can achieve bakery-quality results. Here’s what you’ll need:
- Flour: Choose a high-protein bread flour for that beautiful rise and chewy texture. You can also mix in some whole wheat flour for added flavor and nutrition.
- Water: Use filtered water at room temperature; it helps in gluten development and fermentation.
- Yeast: Active dry yeast or instant yeast works well. This little ingredient is your secret leavening agent that gives your bread rise.
- Salt: Don’t skip this! Salt enhances flavor and controls fermentation. Aim for sea salt or kosher salt for the best results.
Want to dive deeper into the science of baking? Check out this comprehensive guide on the chemistry behind bread-making.
Optional add-ins for flavor and texture
Once you’ve nailed the basics, consider adding some fun twists to your artisan bread. Here are a few ideas:
- Herbs: Fresh or dried rosemary, thyme, or basil can infuse your loaf with mouthwatering flavor.
- Cheese: Incorporate shredded cheese like Gruyère or Parmesan for a cheesy crust.
- Seeds or Nuts: Adding sesame seeds, sunflower seeds, or chopped walnuts enhances texture and provides healthy fats.
Experimenting with these optional ingredients not only enriches your loaf but also gives your kitchen the lovely aroma of baked bread. Why not have a DIY loaf ready for your next gathering?
Preparing Artisan Bread
Making artisan bread at home is a rewarding experience that fills your kitchen with an irresistible aroma. The whole process not only provides a delicious result but also allows you to engage with the ingredients and technique. Let’s dive into the steps you’ll follow to create your very own loaf!
Gather all your ingredients
Before anything else, it’s essential to gather all your ingredients. This will streamline the process and keep your workspace organized. Here’s what you’ll need:
- Flour: High-quality bread flour works best for an airy, crusty loaf.
- Water: Use warm water, ideally around 100°F (38°C) to help activate the yeast.
- Yeast: Active dry yeast or instant yeast can be used interchangeably.
- Salt: This ingredient enhances flavor and regulates yeast activity.
- Optional: Add-ins like herbs, seeds, or spices can provide unique flavors.
You can find high-quality flour options at specialty stores or even online. Don’t hesitate to explore places like King Arthur Baking for some great selections.
Mix the dry ingredients
Once you’ve gathered everything, start by mixing the dry ingredients. In a large bowl, combine the bread flour, yeast, and salt. It’s key to keep the salt and yeast separate until you’re ready to mix the wet ingredients in. Why? Salt can inhibit yeast growth, which might affect your bread’s rise.
Combine wet ingredients and form the dough
In a separate bowl, combine your warm water and any optional ingredients (like a splash of olive oil for richness). Slowly pour this mixture into the dry ingredients, stirring until everything is just combined. You want a shaggy, sticky dough — don’t worry about it being perfect.
Kneading and its importance
Kneading is more than just a workout for your hands; it’s crucial for developing gluten, which gives your artisan bread its structure. Turn the dough onto a lightly floured surface and knead for about 8-10 minutes. You’re looking for a smooth, elastic texture. If you need a refresher on kneading techniques, this guide from BBC Good Food is super helpful!
First rise – what to look for
Now that your dough is kneaded, place it in a greased bowl and cover it with a clean kitchen towel. The first rise should take about 1-2 hours, or until the dough has doubled in size. A warm, draft-free spot is ideal for this. You might be tempted to peek, but resist the urge! Trust the process.
Shaping the dough for the second rise
Once the dough has risen, it’s time to shape it. Gently punch it down to release air built during the first rise. On a floured surface, shape your dough into a round or oval shape, depending on your baking vessel. After shaping, place it on a baking sheet or in a proofing basket. This second rise will take about 30-45 minutes, and you should notice it puffing up again.
Preheat the oven and prepare for baking
While the dough is doing its thing, it’s time to preheat your oven. Aim for a hot 450°F (232°C). You might also want to place a shallow pan filled with water at the bottom of your oven; the steam enhances crust formation, making your artisan bread crusty on the outside and soft on the inside.
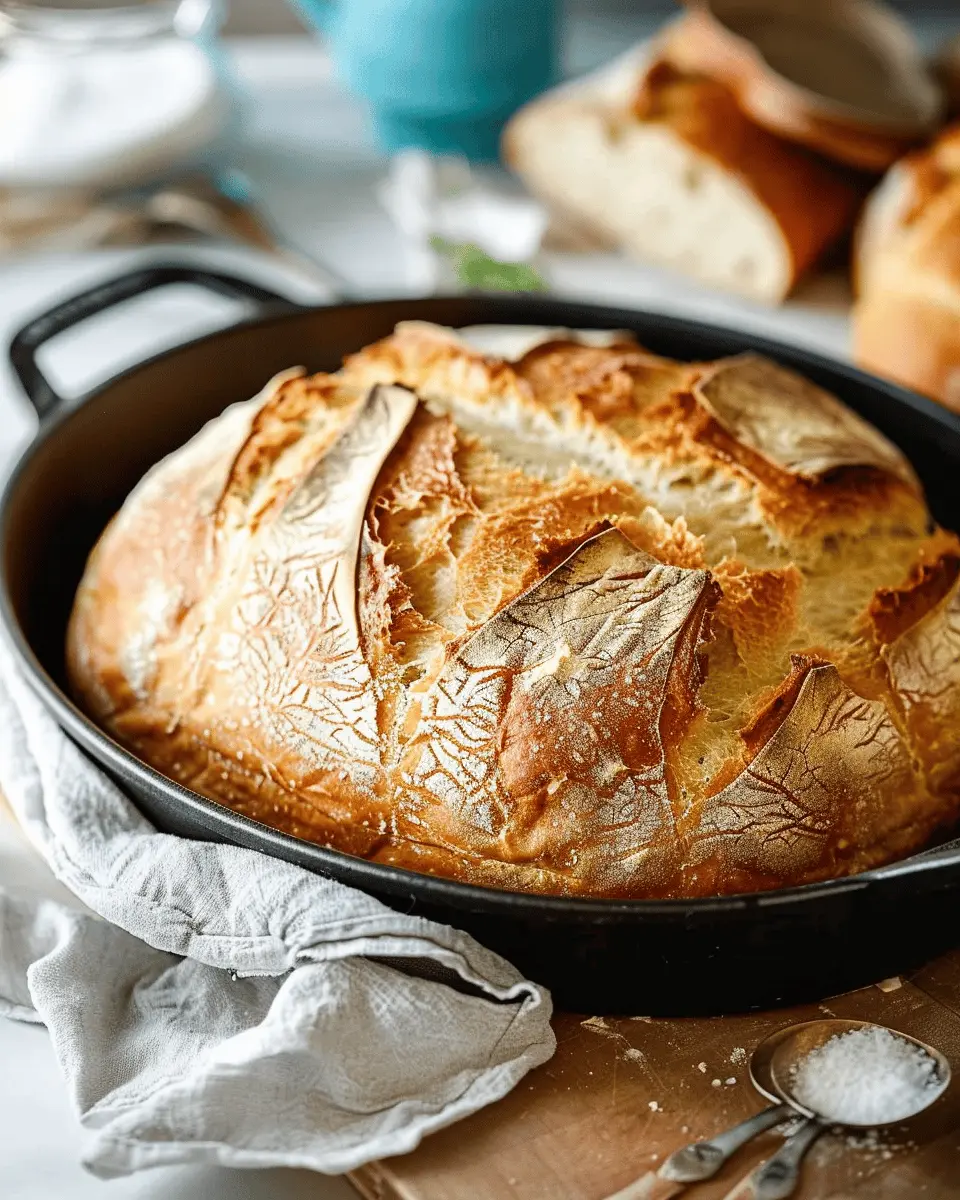
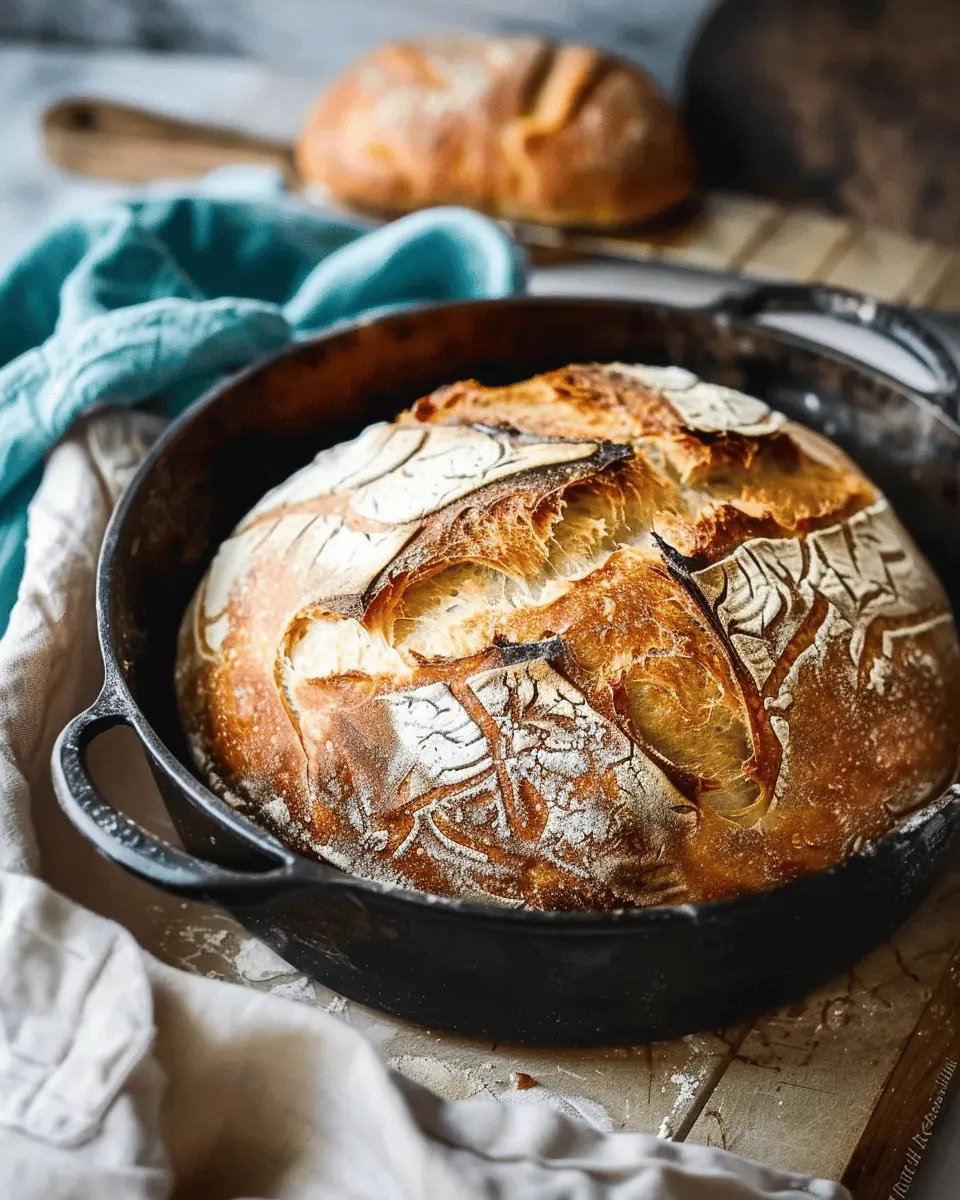
Bake your artisan bread
Once your dough has risen and your oven is hot, it’s time to bake! Slashing the top of the dough allows steam to escape and helps it develop a beautiful crust. Bake for 25-35 minutes, until it’s golden brown and sounds hollow when tapped on the bottom.
Let your loaf cool on a wire rack for at least 30 minutes before slicing. The hard part is waiting, but it’s well worth it. Enjoy your homemade artisan bread as a side to your favorite soup or slathered with butter!
Now that you know these basic steps, don’t hesitate to get creative with flavors and shapes. With practice, you’ll soon become a bread-baking maestro in your own kitchen!
Variations on Artisan Bread
Crafting your own artisan bread is an exciting journey, but once you’ve mastered the basics, the possibilities for variation are endless! Let’s dive into a couple of delightful options to elevate your bread game.
Rustic Country Bread
There’s something undeniably charming about rustic country bread. Picture a loaf with a thick, crusty exterior and a soft, chewy inside. This bread is all about embracing the natural flavors of high-quality ingredients. Here’s how to make your version shine:
- Use a mix of flours: Combine bread flour with whole wheat for depth.
- Add a sourdough starter: This introduces unique tangy notes.
- Experiment with hydration: A wetter dough results in a more open crumb.
For a comprehensive guide on the techniques involved, check out King Arthur Baking’s article on country bread here.
Flavored Artisan Bread
Why stick to plain when you can infuse your artisan bread with flavor? Think beyond the traditional and explore delicious combinations:
- Herbs and garlic: Add fresh rosemary or thyme to the dough for an aromatic twist.
- Cheese: Grate in some aged cheddar or crumbled feta for richness.
- Seeds: Sprinkle sunflower, sesame, or even flax seeds for nutritious crunch.
Imagine serving a warm loaf of rosemary-infused bread beside a bright salad or buttery spread for your next gathering. With just a bit of creativity, these flavor variations can turn your artisan bread into the star of any meal.
Feeling inspired? Grab your apron and start experimenting! The world of artisan bread is wide open, waiting for your unique twist. For more exciting bread recipes and tips, you might enjoy exploring resources at The Bread Baker’s Guild. Your perfect loaf is just around the corner!
Baking tips for Artisan Bread
Creating steam in the oven
One of the secrets to achieving that artisan bread crust you see in bakeries is steam! When you introduce steam into your oven, it helps the dough expand before forming a crust, leading to a beautiful rise and texture. Here are a couple of methods to consider:
- Use a pan: Place a metal baking dish or a cast-iron skillet on the bottom rack of your preheated oven. Pour hot water into it just as you put your dough in.
- Spritz it: Use a spray bottle to mist water inside the oven right after you place your bread in. Repeat this a couple of times for maximum effect.
For more tips on steam baking, check out King Arthur Baking.
How to tell when your bread is done
Ever pulled out a loaf of artisan bread only to find it undercooked? To avoid guessing, use the sound test! Tap the bottom of the loaf — it should sound hollow. You can also check the internal temperature; it should reach about 200°F (93°C). With practice, you’ll develop the knack for knowing when your bread is perfectly baked. Happy baking!
Serving suggestions for Artisan Bread
Pairing artisan bread with spreads and dips
Artisan bread isn’t just a sidekick; it deserves the spotlight! Try spreading cream cheese topped with fresh herbs for a creamy, flavorful combination. A drizzle of olive oil with a splash of balsamic vinegar creates a delightful dip that opens the doors to a world of flavor. Don’t overlook hummus—its smooth texture and nutty taste pair beautifully with the crusty goodness of artisan bread. Want something zesty? Guacamole is fantastic, especially with a sprinkle of cilantro!
Using artisan bread in meals
You might be wondering how to elevate your meal game. Why not use artisan bread as a foundation for a hearty bruschetta? Simply layer it with diced tomatoes, basil, and a drizzle of olive oil. It’s a crowd-pleaser! Another idea is to make a delicious sandwich with turkey bacon, avocado, and spinach—perfect for a quick lunch. You can also transform it into crostini topped with chicken ham and an array of vegetables for an appetizer that everyone will rave about.
If you’re looking for more inspiration, visit Bon Appétit for additional serving suggestions that can perfectly complement your artisan bread journey!
Time details for Artisan Bread
Preparation time
Creating delicious artisan bread starts with about 20 minutes of preparation. This includes mixing your ingredients, kneading the dough, and getting everything ready for the first rise. It’s a perfect time to enjoy a cup of coffee or tea while you wait.
Rising time
The artisan bread needs about 4–6 hours to rise. This may seem lengthy, but it’s during this time that the dough develops its flavor and texture. Just remember, a little patience goes a long way!
Baking time
When it comes to baking, plan for around 30–40 minutes. You want that golden crust to form, so don’t rush it! Artisan bread is all about those beautiful textures.
Total time
In total, you’re looking at around 4–7 hours. However, most of that time is just letting the dough rise, so you can easily fit this into your day. Once you get the hang of it, you’ll wonder how you ever went without this rustic delight!
For a deeper dive into baking techniques, check out King Arthur Baking.
Nutritional information for Artisan Bread
When it comes to indulging in artisan bread, understanding its nutritional offerings can help you appreciate it even more. Let’s break down some essential components that make this delightful bread.
Calories
A typical serving of artisan bread contains about 200-250 calories, which can vary based on ingredients and portion size. This calorie content comes from the natural fermentation process and high-quality ingredients that enhance its flavor.
Carbohydrates
A slice of artisan bread typically has around 40-50 grams of carbohydrates. These carbs provide quick energy, making it perfect for a morning toast or a lunchtime sandwich. However, remember that choosing whole grain options can add extra benefits!
Fiber
One of the best aspects of artisan bread is its fiber content, often ranging between 2 to 4 grams per slice. Consuming fiber is crucial for digestive health, helping keep you full and satisfied. By opting for whole grain variants, you can increase this fiber count further, making each bite more beneficial.
By incorporating artisan bread into balanced meals, you can enjoy its delicious taste while being mindful of its nutritional profile. For more insights, consider checking resources like the USDA Food Data Central to explore comprehensive food details.
FAQs about Artisan Bread
What’s the difference between artisan bread and regular bread?
When diving into the world of artisan bread, you’ll find that the primary distinction lies in the method and ingredients used. Artisan bread is often made using traditional techniques, with high-quality ingredients and without additives. It generally features a longer fermentation process, which develops its unique flavor and texture. On the other hand, regular bread is typically mass-produced and often contains preservatives that can alter taste and freshness. If you’re curious, check out this article on the art of bread baking for more insights.
Can I make artisan bread without a stand mixer?
Absolutely! While a stand mixer can make kneading easier, it’s not essential. You can simply mix the dough by hand. It might take a little more elbow grease, but many bakers swear by hand-kneading for a more personal touch. Just be sure to knead until the dough is smooth and elastic. Plus, it’s a great way to relieve stress after a busy day!
How can I store leftover artisan bread?
To keep your artisan bread fresh, wrap it tightly in a clean kitchen towel or place it in a bread box. Avoid plastic bags, as they can trap moisture and make the crust soft. If you know you won’t finish it in a couple of days, consider slicing the bread and freezing it. Just ensure it’s in an airtight container. When you’re ready to enjoy it again, pop it in the oven for a few minutes to revive that crusty goodness.
Embracing the process of making and enjoying artisan bread can transform your home cooking, so don’t hesitate to dive in and explore!
Conclusion on Artisan Bread
The Satisfaction of Homemade Bread
There’s something truly magical about creating your own artisan bread. The aroma wafting through your home as it bakes can transform an ordinary day into a cozy experience. Not only do you get the satisfaction of mastering the art of bread-making, but you also have a loaf that’s free from preservatives and filled with wholesome ingredients.
Imagine enjoying a slice of freshly baked bread topped with your favorite spreads, perhaps a dollop of avocado or a sprinkle of herbs. The process can be therapeutic too—kneading the dough allows you to unwind and connect with the culinary craft. Plus, when you share that first slice with friends or family, the joy is multiplied.
So why wait? Embrace the experience of baking artisan bread and discover your new favorite hobby—it’s a delicious way to spend your time! For more tips and recipes, check out The Fresh Loaf or King Arthur Baking for endless inspiration.
PrintArtisan Bread Made Easy: A Delightful Recipe for All Bakers
Learn how to make artisan bread with this simple recipe that is perfect for bakers of all levels.
- Prep Time: 15 minutes
- Cook Time: 45 minutes
- Total Time: 18 hours
- Yield: 1 large loaf 1x
- Category: Breads
- Method: Baking
- Cuisine: French
- Diet: Vegetarian
Ingredients
- 4 cups all-purpose flour
- 1.5 cups warm water
- 2 teaspoons salt
- 1 teaspoon instant yeast
Instructions
- In a large bowl, mix the flour, salt, and yeast.
- Add warm water and stir until combined.
- Cover the bowl and let it rise for 12 to 18 hours.
- Preheat the oven to 450°F (230°C).
- Shape the dough and place it on a floured surface.
- Bake in a Dutch oven for 30 minutes with the lid on, then 15 minutes without the lid.
- Cool the bread on a wire rack before slicing.
Notes
- For a crusty loaf, use a baking stone.
- Experiment with different flours for unique flavors.
Nutrition
- Serving Size: 1 slice
- Calories: 200
- Sugar: 0.5g
- Sodium: 400mg
- Fat: 1g
- Saturated Fat: 0g
- Unsaturated Fat: 0g
- Trans Fat: 0g
- Carbohydrates: 42g
- Fiber: 1g
- Protein: 6g
- Cholesterol: 0mg
Keywords: Artisan Bread