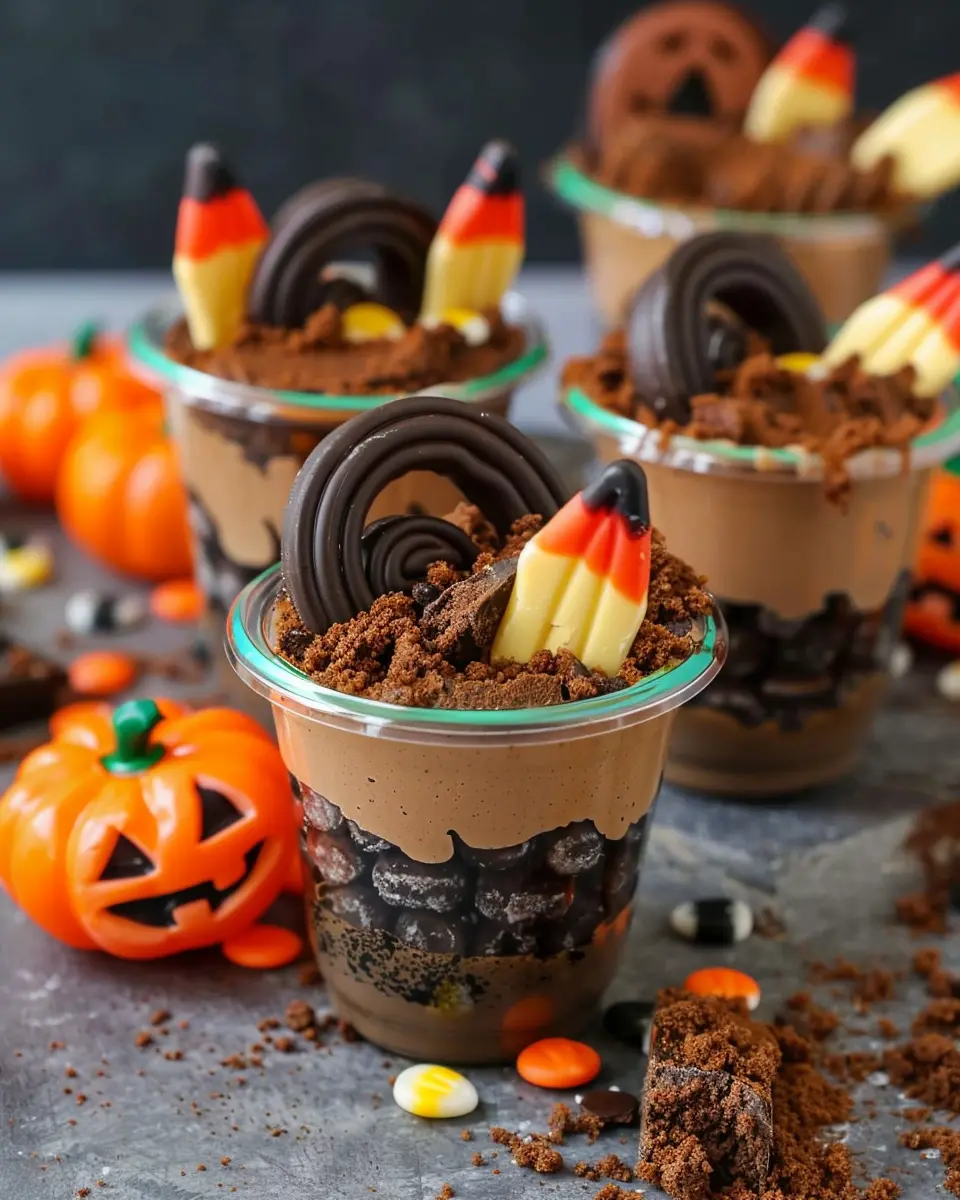
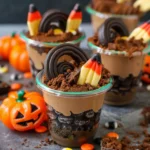
Introduction to Halloween Dirt Cups
Halloween Dirt Cups are a delightful twist on traditional dessert that combines fun and flavor in a way that resonates beautifully with young professionals seeking a touch of nostalgia mixed with creativity. So, what are these enchanting treats? Essentially, Halloween Dirt Cups consist of layers of chocolate pudding, crushed cookies that resemble dirt, and vibrant gummy candies or spooky decorations. Think of them as your childhood chocolate pudding cups, upgraded for adult tastes!
Why Choose Halloween Dirt Cups?
For busy young professionals juggling work and social life, Halloween Dirt Cups offer an easy, quick, and visually appealing dessert solution. Here’s why they’re perfect for your Halloween gatherings:
-
Simple Ingredients: Most recipes call for readily available ingredients like chocolate pudding, Oreos, and your favorite candy. You can whip these up in no time, making them an ideal choice for impromptu gatherings or Halloween parties.
-
Customizable: One of the most enjoyable aspects of making Halloween Dirt Cups is the opportunity to get creative. Want to turn it into a graveyard scene? Add chocolate tombstones, candy skeletons, or edible eyeballs for an extra spooky touch!
-
No Baking Required: This dessert requires no baking—just mix, layer, and chill. It’s perfect for those who prefer to spend less time in the kitchen and more time enjoying the festivities with friends.
-
Shareable Fun: These cups are not just desserts; they’re conversation starters! You can easily make individual cups that guests can grab and enjoy, leading to fun presentations at your Halloween party.
Halloween Dirt Cups bridge the gap between nostalgia and modern tastes, making them an endearing staple for any Halloween gathering. Whether you’re hosting a cozy get-together or a lively costume party, these cups will make the occasion feel special. So grab your favorite Halloween-themed decorations, and let’s dive into making these spook-tacular treats! For more on creative Halloween treats, check out resources like Taste of Home and Food Network.
Ingredients for Halloween Dirt Cups
Creating Halloween Dirt Cups is a fun and spooky way to celebrate the season, and the best part? You can customize them to suit your taste! Here’s what you’ll need to whip up these delicious treats:
Key Ingredients
- Chocolate Pudding: 3 cups of rich chocolate pudding, store-bought or homemade.
- Crushed Oreos: About 10-12 Oreo cookies, crushed to create that “dirt” effect.
- Whipped Topping: 2 cups of whipped topping for a creamy layer.
- Gummy Worms: A handful of gummy worms for that creepy crawl factor.
- Plastic Cups: Clear plastic or Halloween-themed cups to showcase your fantastic creation.
Optional Ingredients
- Turkey Bacon: For a savory twist, consider adding crisp turkey bacon bits (representing crunchy bugs).
- Chocolate Sprinkles: Sprinkle some on top for extra texture.
- Decorative Toppers: Sprinkles, creepy-crawly decorations or edible glitter can elevate your cups.
Building these layers is like crafting a masterpiece; it’s all about presentation and taste. Check out this guide for tips on creating the perfect pudding base. Just imagine how excited your friends will be to dig into these ghoulishly good desserts. A little creativity goes a long way, so don’t hesitate to get crafty with your Halloween Dirt Cups!
Step-by-Step Preparation of Halloween Dirt Cups
Creating Halloween Dirt Cups is a delightful way to celebrate the spooky season. These sweet treats are not only fun to make but are also a hit at any Halloween gathering! In just a few steps, you can whip up these creepy yet delicious treats that will have everyone feeling festive. Let’s dive into the preparation process!
Gather Your Spooky Ingredients
Before you embark on this tasty adventure, make sure you have all the spooky ingredients on hand. Here’s what you’ll need:
- Chocolate pudding mix (two 3.4 oz packages will do)
- Milk (approximately 4 cups)
- Oreos (a standard package will suffice for the dirt layer)
- Gummy worms (perfect for crawling out of your dirt!)
- Plastic cups (clear ones are best for that layered effect)
- Optional: Whipped cream for extra creaminess, and Halloween-themed sprinkles or decorations.
Once you have your ingredients ready, your kitchen is officially prepped for an eerie dessert creation!
Prepare the Chocolate Pudding
Let’s get to the heart of the matter—the chocolate pudding! It’s simple, but you’ll need to follow the instructions on the pudding mix box. Typically, this is how it goes:
- In a mixing bowl, combine the chocolate pudding mix with the milk.
- Whisk it together until it’s smooth and free of lumps. This usually takes about 2 minutes.
- Let it sit for a few minutes to thicken.
If you want some expert advice on making the perfect pudding, Food Network has a great guide you can check out here.
Crush the Cookies for the “Dirt”
Now that your pudding is thickened and ready to go, it’s time to create the dirt! Take those Oreos and crush them into fine bits. You can do this a few different ways:
- In a plastic bag: Place the Oreos in a resealable bag and gently crush them with a rolling pin—this can be kind of fun!
- Using a food processor: If you have one handy, just pop the cookies in and pulse until you reach a dirt-like consistency.
Whichever method you choose, make sure not to leave any large chunks—nobody wants a rocky dirt cup!
Layer the Pudding and “Dirt” in Cups
The exciting part is here: layering your Halloween Dirt Cups! Follow these steps to create a visually striking treat:
- Spoon some of the chocolate pudding into the bottom of your clear cup, filling it about one-third full.
- Next, sprinkle a generous layer of crushed Oreos on top, making it look like soil.
- Repeat this process, alternating layers until you reach the top of the cup. This creates a beautiful, spooky effect!
The contrasting colors of the pudding and the cookie “dirt” will have your guests admiring your handiwork long before they dig in!
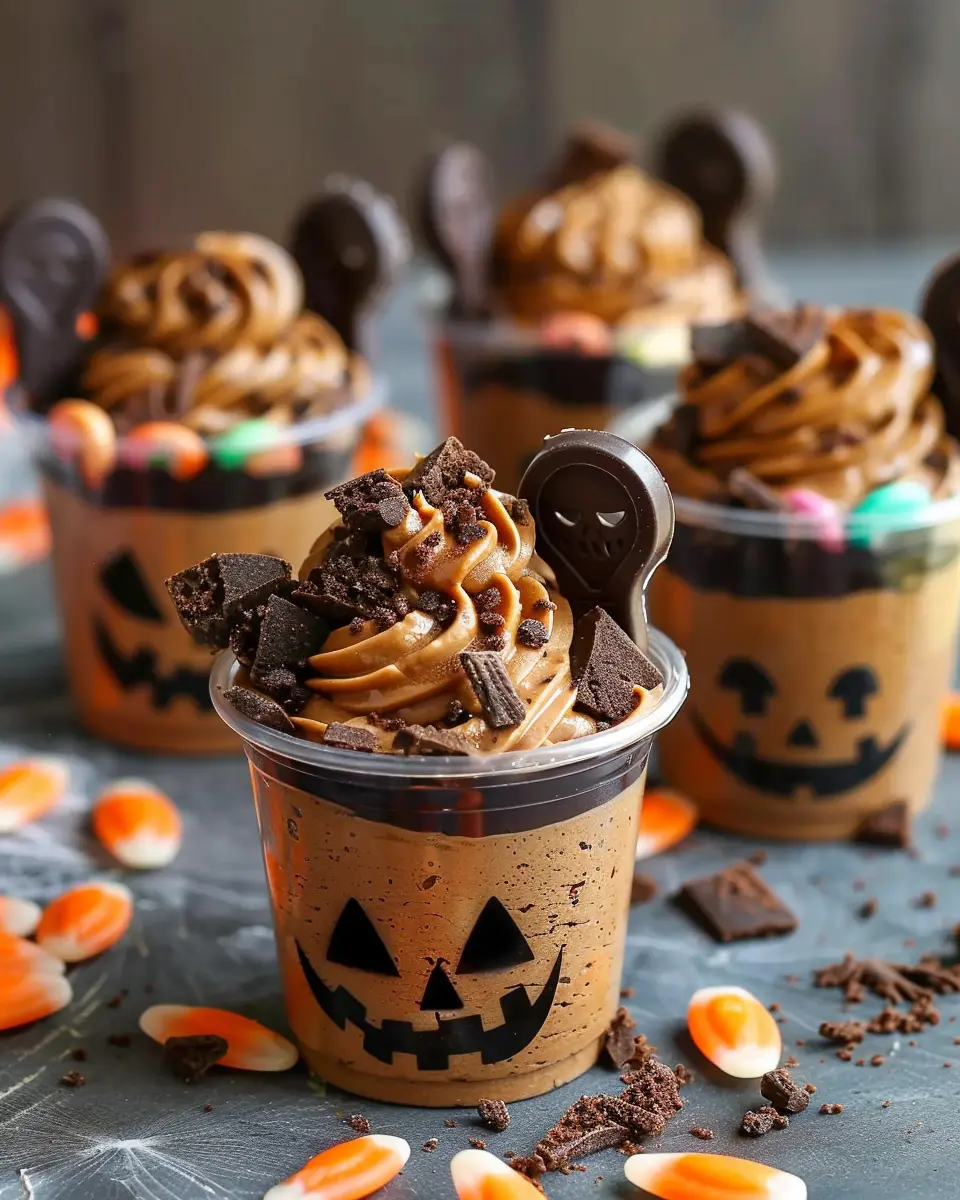
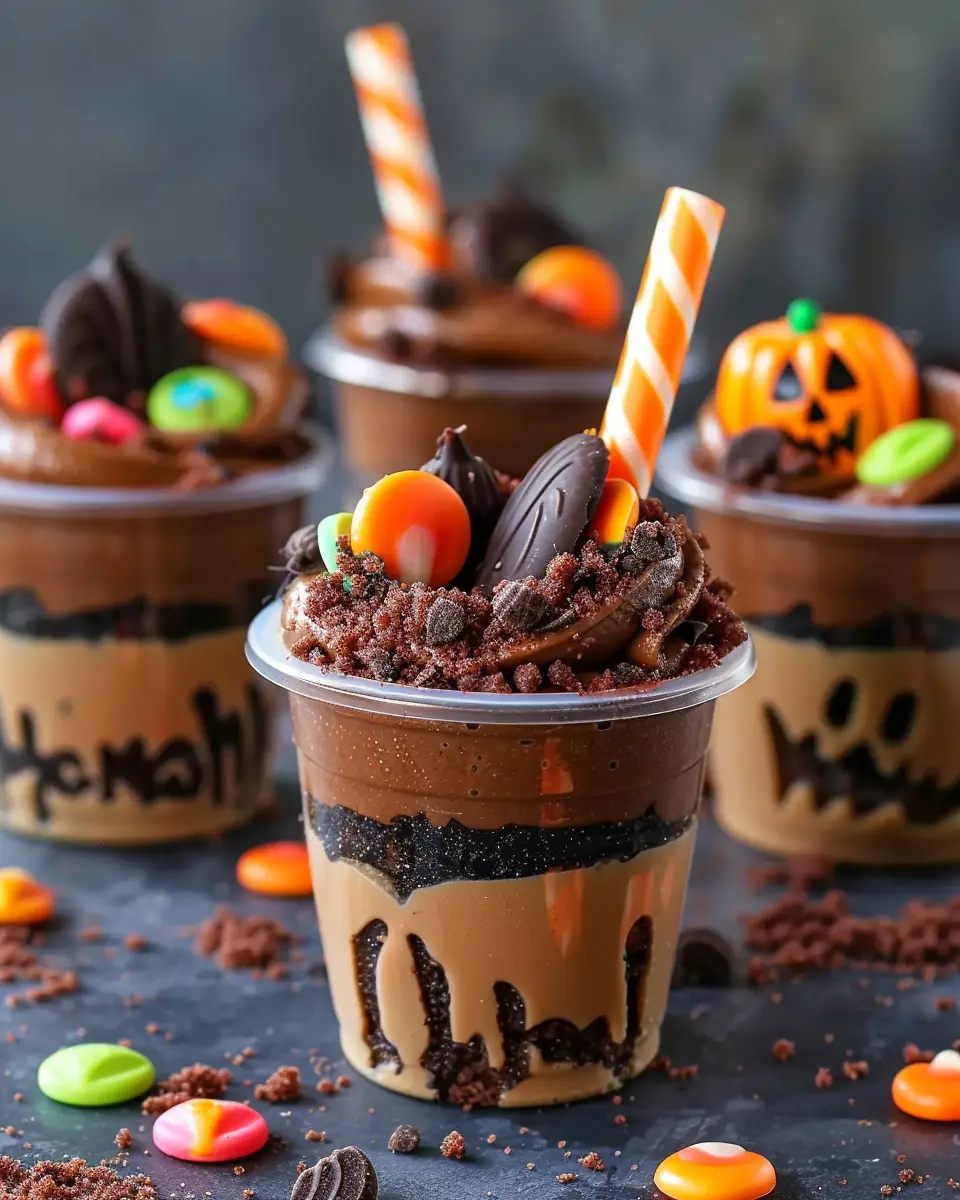
Add Halloween-Themed Decorations
To give your Halloween Dirt Cups that final spooky touch, it’s time to get creative with decorations:
- Gummy worms: Place a few of these slithery candies over the top layer of dirt.
- Sprinkles: Add Halloween-themed sprinkles for a pop of color and added festivity.
- Decorative toppers: Consider using cookie cutters to create Halloween-shaped cookies or toppers from colorful paper; these can add charm and whimsy.
Feel free to personalize each cup based on your guests’ preferences. You might even want to write their names with icing to create a haunted dessert buffet!
With these easy steps, you’ll have a crowd-pleasing treat that’s sure to enchant kids and adults alike! Enjoy your Halloween celebration and the delightful taste of your homemade Halloween Dirt Cups.
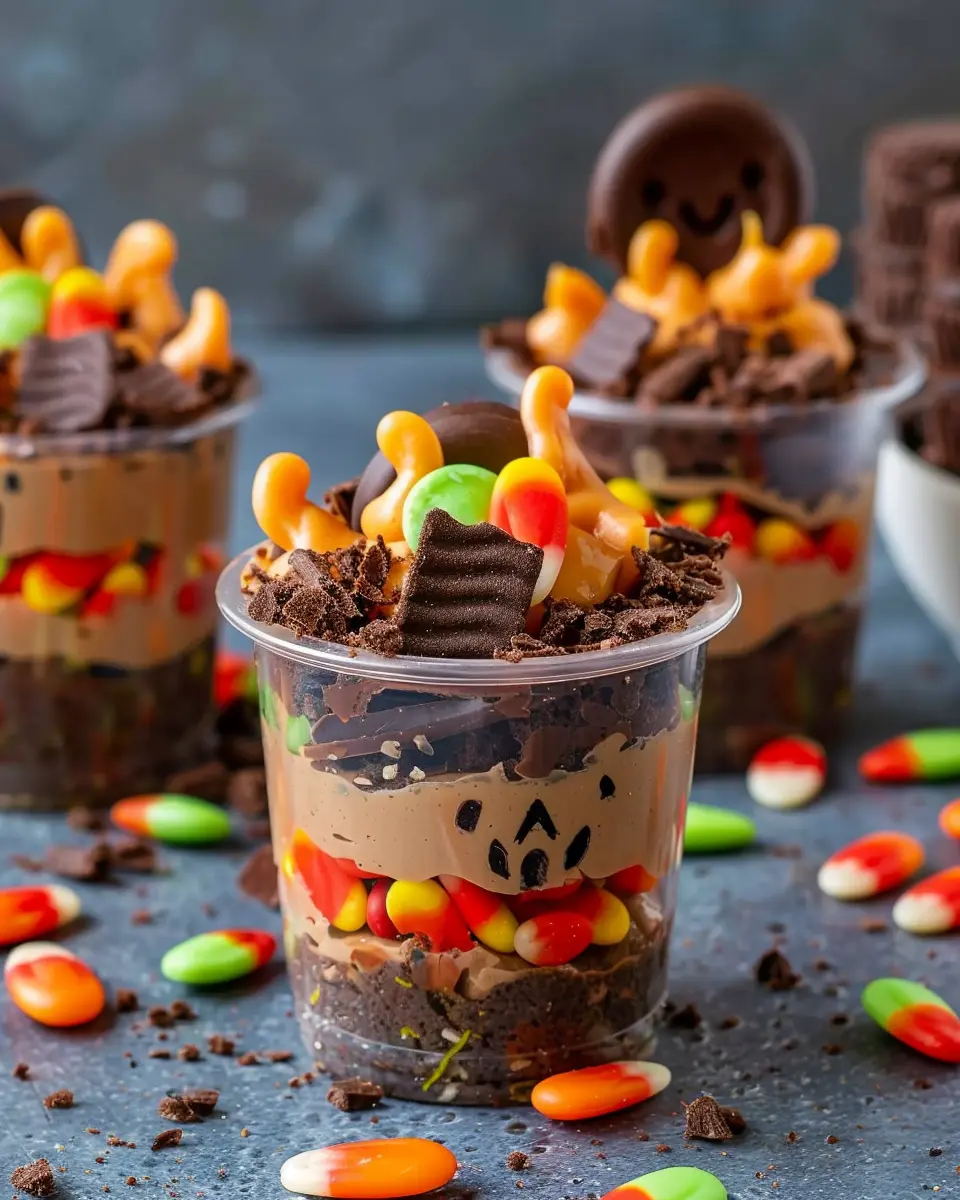
Variations of Halloween Dirt Cups
Halloween Dirt Cups are a delightful treat that can be customized in so many fun ways. Here are a couple of variations you might want to try for your spook-tacular gatherings.
Gummy Worms and Bugs Twist
For a classic spin on Halloween Dirt Cups, gummy worms and edible bugs are a must! Imagine a delicious layer of chocolate pudding, perfectly topped with crushed cookies for that irresistible “dirt” look, then adorned with adorable gummy critters crawling in and out of your cup. This playful combination is exciting for both kids and adults and gives your cups an authentically eerie vibe.
- Tip: Use cookie crumbles made from chocolate sandwich cookies for the best texture.
- Serving suggestion: Create a layered effect by alternating gummy candies in each layer of dirt and pudding.
You can find inspiration for spooky treats at sources like The Spruce Eats for ideas and serving suggestions.
Vegan-Friendly Dirt Cups
If you’re catering to a plant-based crowd, fear not! Vegan-friendly Halloween Dirt Cups can be just as indulgent. Swap traditional pudding for a rich and creamy silken tofu-based chocolate mousse or a store-bought vegan pudding. Use dairy-free whipped topping to achieve that fluffy texture you crave. Simply layer with crushed vegan cookies and decorate with your favorite plant-based gummy candies.
- Extra idea: Enhance the flavor by adding a splash of vanilla or a pinch of sea salt to the mousse.
- Customize: Top with fresh fruit or nuts for added texture and taste.
For more vegan dessert ideas, check out Minimalist Baker for some mouth-watering recipes.
With these variations on Halloween Dirt Cups, you can easily please every guest at your Halloween gathering, ensuring a deliciously good time!
Cooking Tips and Notes for Halloween Dirt Cups
Creating delightful Halloween Dirt Cups is a fantastic way to engage your creativity in the kitchen while offering a fun treat for friends and family. Here are some insightful tips to elevate your dessert game:
Choose the Right Ingredients
- Layering Matters: When building your cups, alternate chocolate pudding, crushed cookies, and candy for that appealing “dirt” effect. The visual layers make it more enticing.
- Consider Texture: Incorporating Turkey Bacon bits can add a unique savory touch that surprisingly complements the sweetness.
Tempting Flavor Variations
Want to switch things up? Feel free to add different flavors of pudding—vanilla or butterscotch work beautifully with the chocolate layers. For a Halloween theme, mix in a dash of orange or green food coloring!
Personal Touch
Don’t hesitate to let your personality shine in your Halloween Dirt Cups. Add seasonal sprinkles or themed decorations like gummy worms or plastic spiders. This customization will impress your guests and create lasting memories.
For more inspiration, check out this guide on festive desserts to spark your creativity!
By integrating these helpful tips, your Halloween Dirt Cups will surely be the highlight of any gathering!
Serving Suggestions for Halloween Dirt Cups
Halloween Dirt Cups are not just a treat; they’re an experience! Here are some fun ideas for serving these delightful cups to make your Halloween gathering unforgettable.
Create a Spooky Display
To elevate your presentation, consider using miniature Halloween-themed decorations. Think craft spiders, faux cobwebs, and glow-in-the-dark creatures perched around each cup. This adds a touch of whimsy, creating the perfect atmosphere for your party.
Customize with Toppings
Get creative with toppings! Add crushed cookies, gummy worms, or even edible glitter to enhance the eerie effect of your Halloween Dirt Cups. Personalizing each cup allows guests to indulge in their favorite flavors, making it a hit among both kids and adults.
Pair with Themed Beverages
Serve alongside ghostly smoothies or pumpkin spice lattes to complement your Halloween Dirt Cups. These beverages can add a festive vibe, making your dessert table a focal point of your gathering. Looking for recipe inspiration? Check out these festive drinks.
These serving suggestions will not only impress your guests but also evoke the spirit of Halloween in every bite! How will you serve your Halloween Dirt Cups?
Time Breakdown for Halloween Dirt Cups
When you’re gearing up for a festive night of fun, it’s essential to know how long your Halloween Dirt Cups will take to prepare and enjoy. Here’s a quick look at the time commitment involved:
Preparation Time
You’ll spend about 15 to 20 minutes gathering your ingredients and prepping the toppings for these spooky delights. This includes crushing the cookies for that dirt-like texture, chopping any additional treats, and measuring out your pudding and whipped cream.
Assembly Time
The real fun begins when you assemble your Halloween Dirt Cups! This should only take another 10 to 15 minutes. Layering the pudding, cookie crumbles, and decorations can even become a mini competition among friends or family—who can create the spookiest design?
Total Time
Overall, you’re looking at a total of about 30 to 40 minutes from start to finish. Not too shabby for such a fun and delicious treat! Plus, it’s a fantastic opportunity to engage with your guests while creating something truly festive. For more festive recipes, check out Food Network or AllRecipes.
Nutritional Facts for Halloween Dirt Cups
When indulging in Halloween Dirt Cups, it’s good to keep nutrition in mind. Here’s a quick breakdown of what you’re treating yourself to:
Calories
A serving of these delightful treats contains approximately 250-300 calories. While it’s a fun dessert perfect for the season, it’s wise to enjoy it in moderation.
Sugar Content
Each cup can pack in about 20-25 grams of sugar. To keep things on the healthier side, consider using alternatives like agave nectar or reducing the amount of candy.
Dietary Alternatives
Making Halloween Dirt Cups friendlier for various diets is simpler than you think! You can swap the pudding for plant-based versions or utilize gluten-free cookies for those avoiding gluten. Additionally, low-sugar or sugar-free options are available for those watching their sugar intake.
For a deeper dive into sugar alternatives, check out Healthline’s article on sweeteners for ideas that could elevate your Halloween festivities without compromising health.
By keeping these nutritional facts in mind, you’ll ensure that your Halloween Dirt Cups are not just tasty, but a festive treat you can feel good about sharing!
FAQs about Halloween Dirt Cups
Can I make Halloween Dirt Cups ahead of time?
Absolutely! Halloween Dirt Cups are perfect for preparation in advance. You can assemble them up to two days ahead of your Halloween gathering. Just be sure to store them in the refrigerator, and add any decorations, like gummy worms or candy corn, right before serving. This keeps them looking festive and fresh!
What are some fun ways to decorate them?
When it comes to decorating Halloween Dirt Cups, sky’s the limit! Here are some creative ideas:
- Gummy Worms: Drape them over the edge for a creepy touch—perfect for that classic Halloween vibe.
- Candy Corn: Sprinkle them on top for a burst of color and sweetness.
- Chocolate Sprinkles: Use crushed Oreos or chocolate sprinkles to mimic dirt for that quintessential look.
- Spooky Picks: Use themed cupcake toppers or festive toothpicks with bats or ghosts to elevate the fun.
Feel free to visit All Recipes for more decoration ideas that can make your cups stand out!
Are there healthier alternatives to classic dirt cups?
Yes, there are! You can create a healthier version of your favorite Halloween Dirt Cups. Consider substituting the classic pudding with Greek yogurt mixed with cocoa powder or using chia seed pudding. Instead of crushed cookies, use a blend of nuts and oats to create that “dirt” texture. This way, you maintain the fun of the dessert while adding some nutritional value. Remember, celebrating doesn’t have to mean compromising on health!
For more healthy Halloween treats, check out EatingWell.
Conclusion on Halloween Dirt Cups
In summary, Halloween Dirt Cups are a delightful way to celebrate the spookiest season with a fun and interactive dessert. Not only do they look festive, but they also allow for creativity in presentation and ingredients. Whether you use chocolate pudding, crushed cookies, or add a twist with gummy worms, these cups are sure to impress both kids and adults alike. Plus, assembling them can be a great way to bond with friends or family before the festivities. For tips on hosting a Halloween party, check out resources from sites like Good Housekeeping or Martha Stewart. Dive into this yummy treat and make your Halloween unforgettable!
PrintHalloween Dirt Cups: Easy and Fun Treats for Spooky Celebrations
Delight your guests with these easy and fun Halloween Dirt Cups, perfect for spooky celebrations!
- Prep Time: 15 minutes
- Total Time: 45 minutes
- Yield: 4 servings 1x
- Category: Desserts
- Method: Chilling
- Cuisine: American
- Diet: Vegetarian
Ingredients
- 1 package chocolate pudding
- 2 cups milk
- 1 package Oreo cookies, crushed
- 1 cup whipped cream
- Gummy worms for decoration
Instructions
- In a mixing bowl, whisk together the chocolate pudding and milk until smooth.
- In a separate bowl, fold in the whipped cream with the pudding mix until fully combined.
- Layer the crushed Oreo cookies at the bottom of cups.
- Add a layer of the pudding mixture on top of the Oreos.
- Repeat the layers until the cups are filled.
- Top with crushed Oreos and add gummy worms for decoration.
- Chill in the refrigerator for at least 30 minutes before serving.
Notes
- For an extra spooky touch, use Halloween-themed cups.
- Feel free to add layers of other candies like candy corn.
Nutrition
- Serving Size: 1 cup
- Calories: 250
- Sugar: 15g
- Sodium: 100mg
- Fat: 12g
- Saturated Fat: 7g
- Unsaturated Fat: 3g
- Trans Fat: 0g
- Carbohydrates: 32g
- Fiber: 1g
- Protein: 4g
- Cholesterol: 30mg
Keywords: Halloween, Dirt Cups, Easy Treats, Spooky Celebrations